How to organize your emails with labels
Put little name tags on your emails, like Clients, Invoices or Travel, and find them again in one click.
- Time needed
- About 2 minutes
- What you need
- Talanoa, and a few emails that belong together
Little name tags for your emails 🏷️
A label is a name tag you stick on an email. “Invoices”. “Travel”. “Clients”.
One email can wear several tags at once. A plane ticket can be both “Travel” and “Invoices”. That’s the nice thing about labels: unlike a folder, an email doesn’t have to choose.
Later, click a label and you see every email wearing that tag. Like a drawer that sorts itself.
If you use Gmail, you already know labels. Talanoa shows the ones you made in Gmail. Using Outlook, iCloud or another provider? Your folders work the same way.
Step 1: Add a label to an email
- Open the email.
- Click the label button at the top (a tag with a little +), or press
L. - Click the label you want.
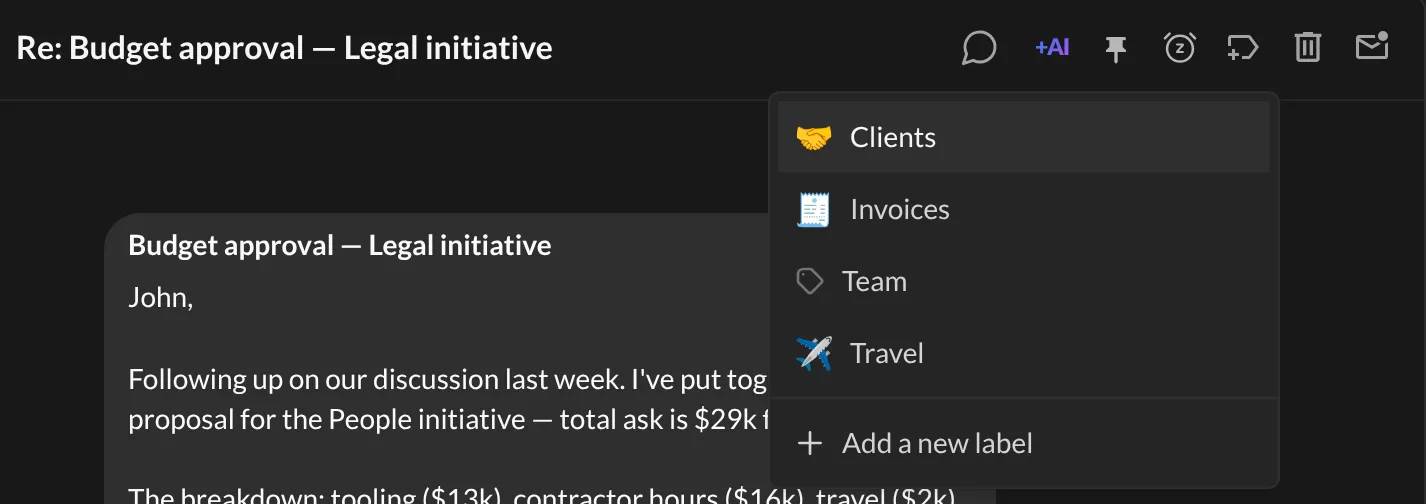
Talanoa says Label “Travel” added. To take a label off, open the same menu and click it again.
In a hurry? Move your mouse over an email in your list and click the tag button that appears on the right. No need to open it.
Step 2: Create a new label
If you’re in an email: open the label menu, then click Add a new label. Type a Label Name, pick an emoji if you like, then click Save. The new label is added to that email right away.
If you’re in Settings: open Settings (Cmd+, on Mac, Ctrl+, on Windows and Linux), click Labels, then Add Label. Type a Label name, pick an icon if you want, then click Create.
And… that’s it! 🎉 Your emails have their name tags.
Let Talanoa do it next time
After you add a label, Talanoa may ask: “Do you want to apply this label automatically for next email from this sender?”
Click Yes, and every new email from that sender gets the label on its own. Clever little app. This creates a rule, which you can change later in Sort emails automatically with rules.
Choose which labels you see
Too many labels in your sidebar? Tidy them up.
- Open Settings, then click Labels.
- Pick the Account at the top, if you have several.
- Click the eye next to a label to Hide label or Show label. Hidden labels stay on your emails, they just leave your sidebar.
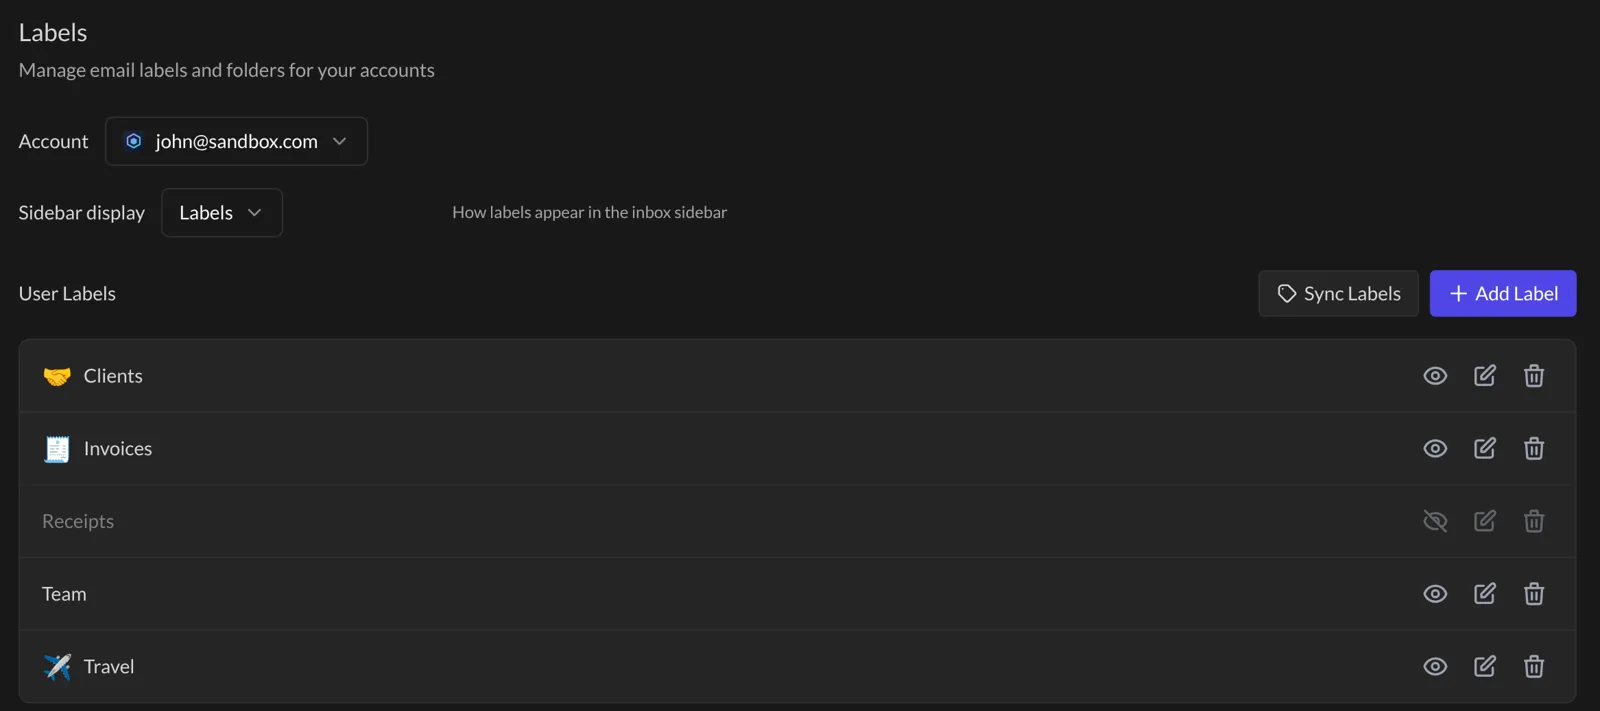
You can also:
- Rename a label with the pencil (Edit label), or remove it with the trash can (Delete label).
- Change Sidebar display to Folders if you prefer that word in your sidebar.
- Click Sync Labels to fetch labels you just made in Gmail or another app.
Find your labeled emails
Look at the left sidebar, in the Labels section. Click a label to see all its emails.
You can also press Cmd+K on Mac (Ctrl+K on Windows and Linux), type the label’s name, and jump straight to it.
Something went wrong?
“I made a label in Gmail and I don’t see it.” Open Settings → Labels and click Sync Labels. If it’s still missing, check that it isn’t hidden (the eye is crossed out).
“A label disappeared from my sidebar.” It’s probably hidden. In Settings → Labels, click the crossed-out eye to show it again.
“The L key doesn’t do anything.” Open an email first. You can also change this key in Settings → Shortcuts.
Still stuck? Write to us at [email protected]. A real human will answer.
